Entertainment for kids : How to make a DIY Draw-Bot for kids
- jude nkereuwem
- Jul 3, 2024
- 3 min read
Introduction
Hello!
Welcome to Makersgeneration - Your first choice for easy science experiments for kids.
Hey makers! Ready for a fun and easy project that will get your creativity flowing? In this blog post, we'll learn how to make a simple scribbling robot – a little machine that draws cool patterns all by itself!
This project is perfect for kids of all ages who love to create and explore. With just a few everyday items, you can build your own robot artist. But, before we go into making our DIY robot for kids, let's quickly look at the materials we'll need for this project:
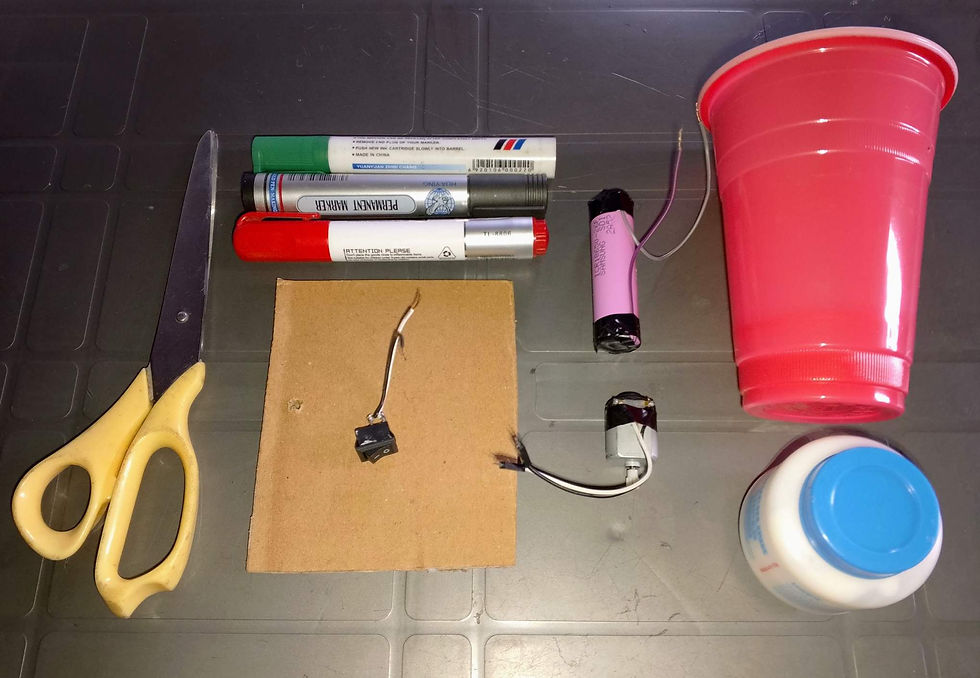
Required materials
Plastic cup
DC motor
Battery
Power switch
Jumper wires
Cardboard paper
Scissors
3 Marker pens (of different colors.)
Glue or Tape
White plain sheet of paper
Workings
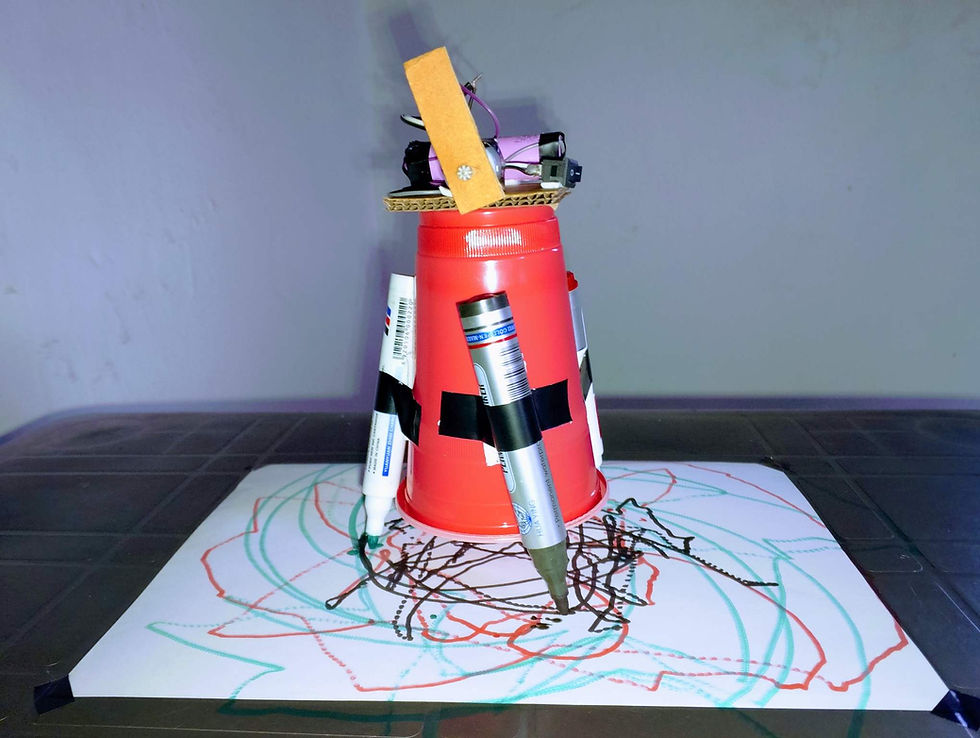
This project works mainly on the principle of vibration. The vibration is produced with the help of a DC motor and a little weight (cardboard paper) attached to the motor shaft. Once the system is turned on and the motor starts to turn, it vibrates the plastic cup, and the markers attached to the cup start moving in random directions on the surface it is placed on thereby creating different colorful patterns.
Steps to make a drawing robot
Follow these simple steps below to make your Draw-Bot:
Step 1:
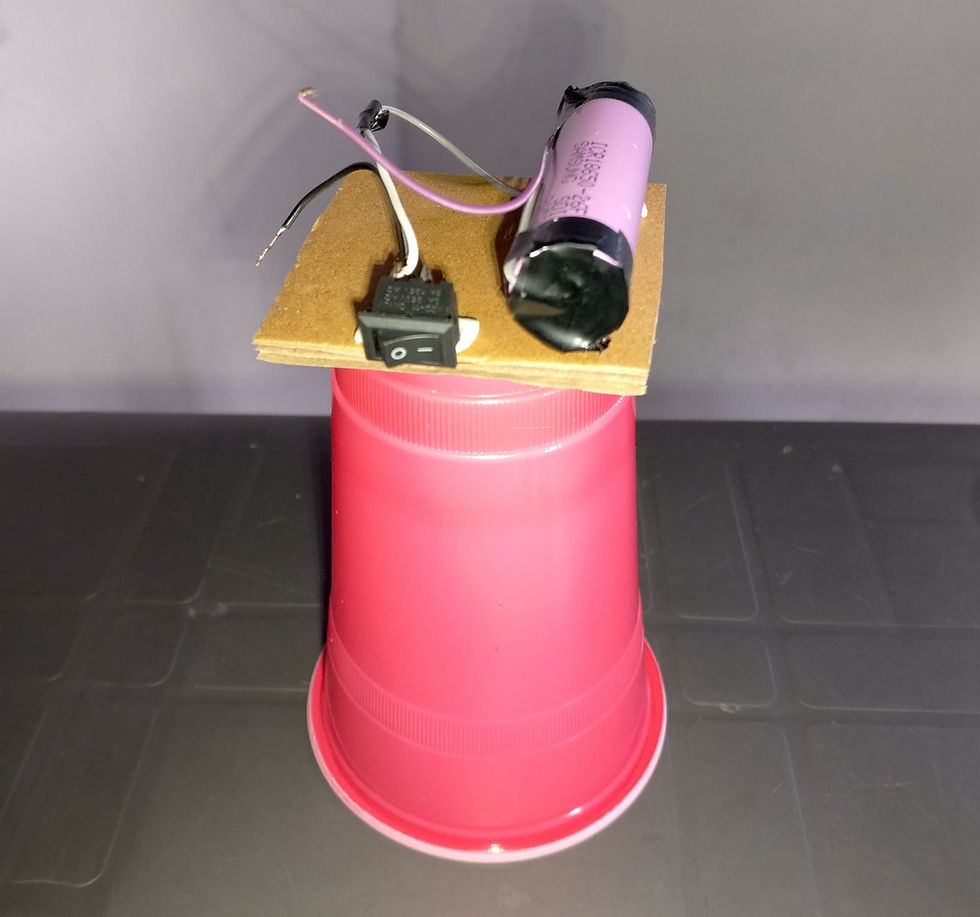
Turn the plastic cup upside down and glue a small square cardboard cutout to the base of the cup.
Step 2:
Glue the battery and power switch to the cardboard cutout and connect them following the circuit diagram below:
Step 3:
Secure the DC motor also to the cardboard with the motor shaft extending beyond the edge of the cardboard paper, then connect the three devices following the circuit in step 2.
Step 4:
Next, cut out a small rectangular piece from the cardboard paper, make a small hole towards the end of the paper then fit the shaft of the DC motor tightly through the hole.
Step 5:
Secure the 3 marker pens around the body of the plastic cup with glue or tape.
Step 6:
Secure a white sheet of paper on a flat surface with tape (this will act as your drawing canvas)
Take off the lids from the marker pen, then place your Draw-Bot on the white paper. Your Draw-Bot is ready for some scribbling!!
Demo video
Turn on the power switch and watch your bot amaze you with some artistry.
If you enjoyed working on today's project and would love more projects related to science at home for kids, then you should check below for our amazing offerings.
STEM Summer camp in DC and Maryland
You are looking for a nice 2024 summer camp for this year for your children focusing on STEM (Learn how to code, make robots, use 3D printing, droning and more) in the Washington DC, Maryland and Northern Virginia area. Come join us in Silver Spring Maryland where your children can learn and have fun.
Check the following link for more details and the dates:
Online after-school focused on STEM
You and your children are looking for nice activities to have fun and learn new things and skills. Come join us for online classes such as:
Python coding for kids and teens
Coding for elementary school students
Make video games
Electronics
Digital modeling (Create cars, rockets, rings, etc) for 3D printing and much more with the following link: Online after-schools
Other cute things to make and hand-crafts for kids (tutorials)
If you are looking for more cool Arduino and STEM project ideas to do with your kids, take a look at these other activities:
Newsletter, follow, subscribe, and like the social media
If you like online STEM activities, consider subscribing to the newsletter and social media for updates, and don't miss any STEM events. Don't forget to subscribe to the newsletter at the bottom of our website ''www.makersgeneration.net'' for more events, tutorials, and freebies.
Subscribe to the Facebook group if you have yet registered. Content and tutorials are shared daily: Create and build STEM projects for kids
We can be reached at: contact@makersgeneration.net if any questions.
See you very soon.


Comments